The Character Builder turns people into reusable building blocks. You create a character once, with as much or as little AI help as you want, and then drop them into any infinite story or short story you start. Published characters join a public library that everyone can browse and use.This guide covers the builder page, the four creation modes, the guided wizard, fleshing out side characters from existing stories, and how a finished character gets into your next story.
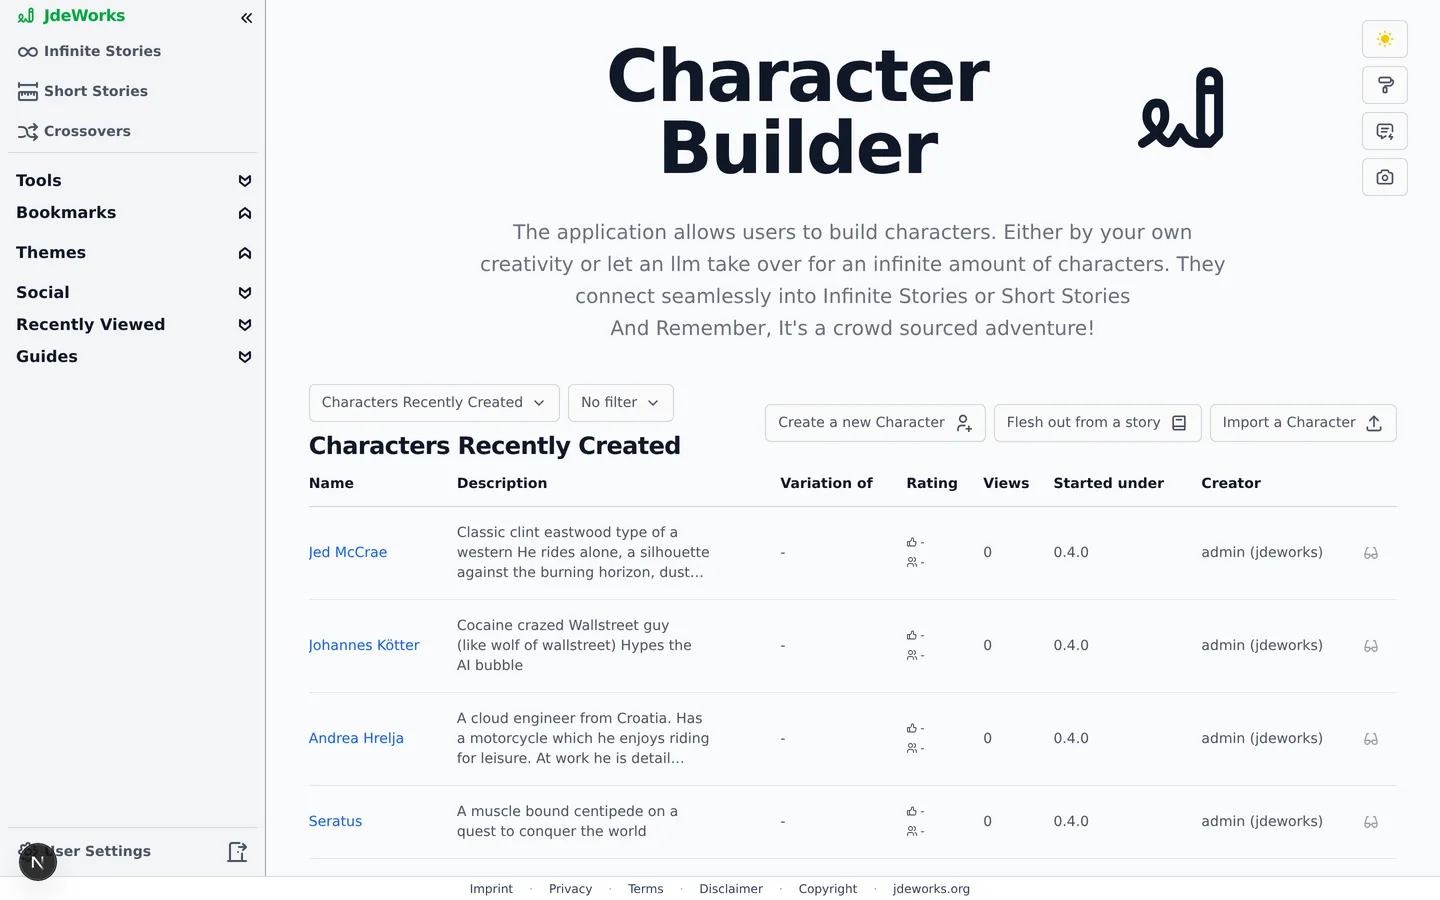
Open Character Builder from the sidebar's tools group. The page lists published characters in a table you can switch between Characters Recently Created, Characters Most Viewed and Characters Best Rated. Logged in, a second dropdown filters for Only mine or Exclude mine.Browse everyone's published characters, or start your own.Three buttons start something new: Create a new Character, Flesh out from a story and Import a Character. Browsing is open to everyone, creating requires an account.
Creating a character
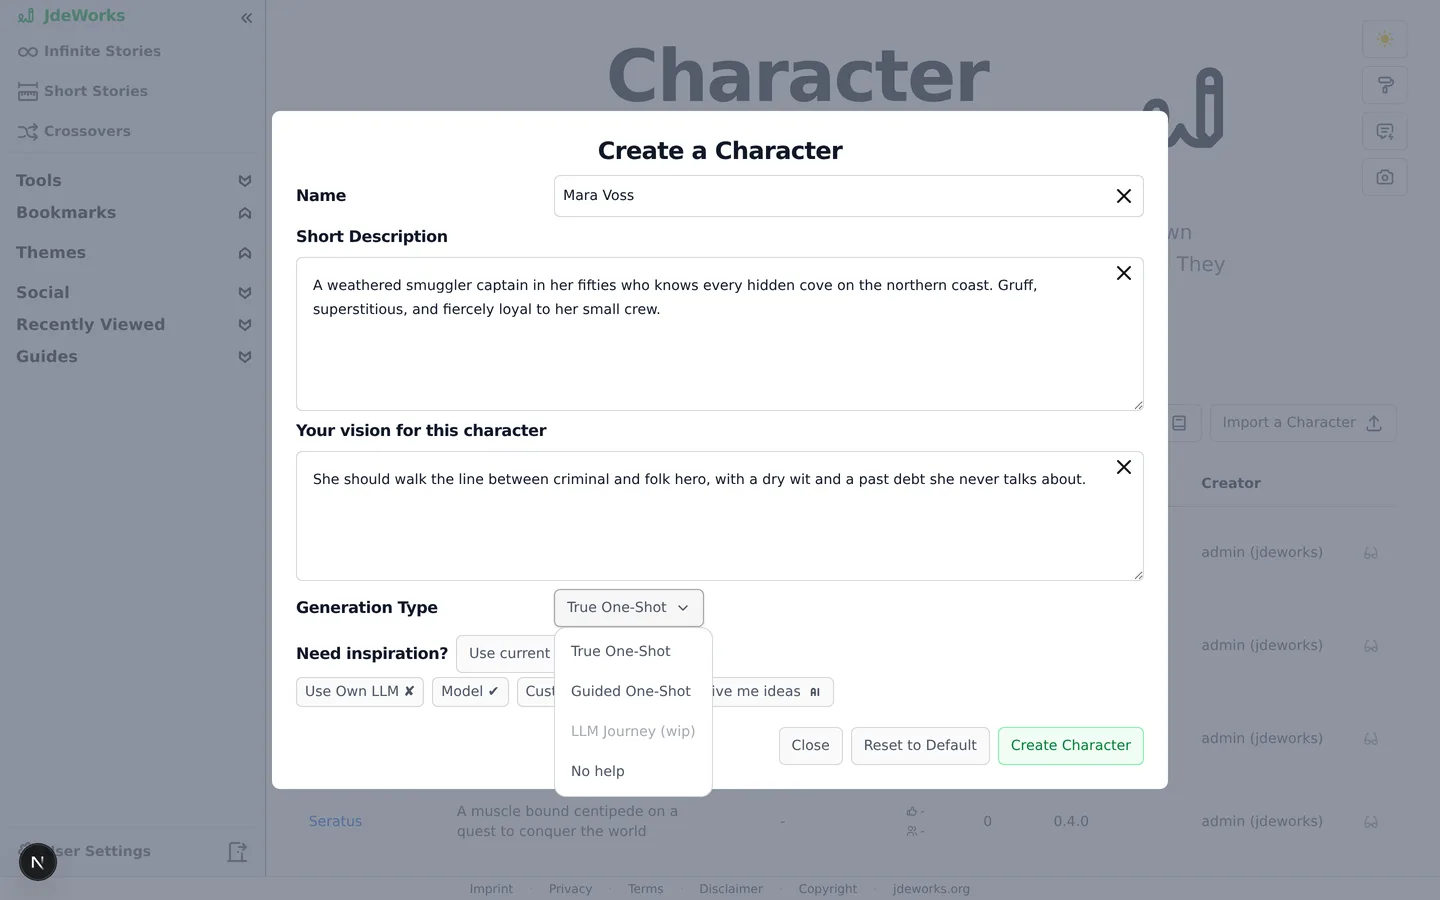
Click Create a new Character. The dialog asks for a Name, a Short Description and Your vision for this character.
Pick a Generation Type: True One-Shot generates the whole character sheet in one go, Guided One-Shot walks you through eight themed steps, and No help leaves everything to your own writing.
Stuck on ideas? The Need inspiration? row generates five character concepts with Give me ideas. Clicking a concept fills the fields, and a dropdown chooses between Use current fields and Clean slate.
Click Create Character. This only creates the entry and opens its page. Nothing is generated yet.
The generation type decides how much the AI helps.
Creating the character is free. Credits are only spent when you press an AI button, and every AI button shows its price before you click.
The guided wizard
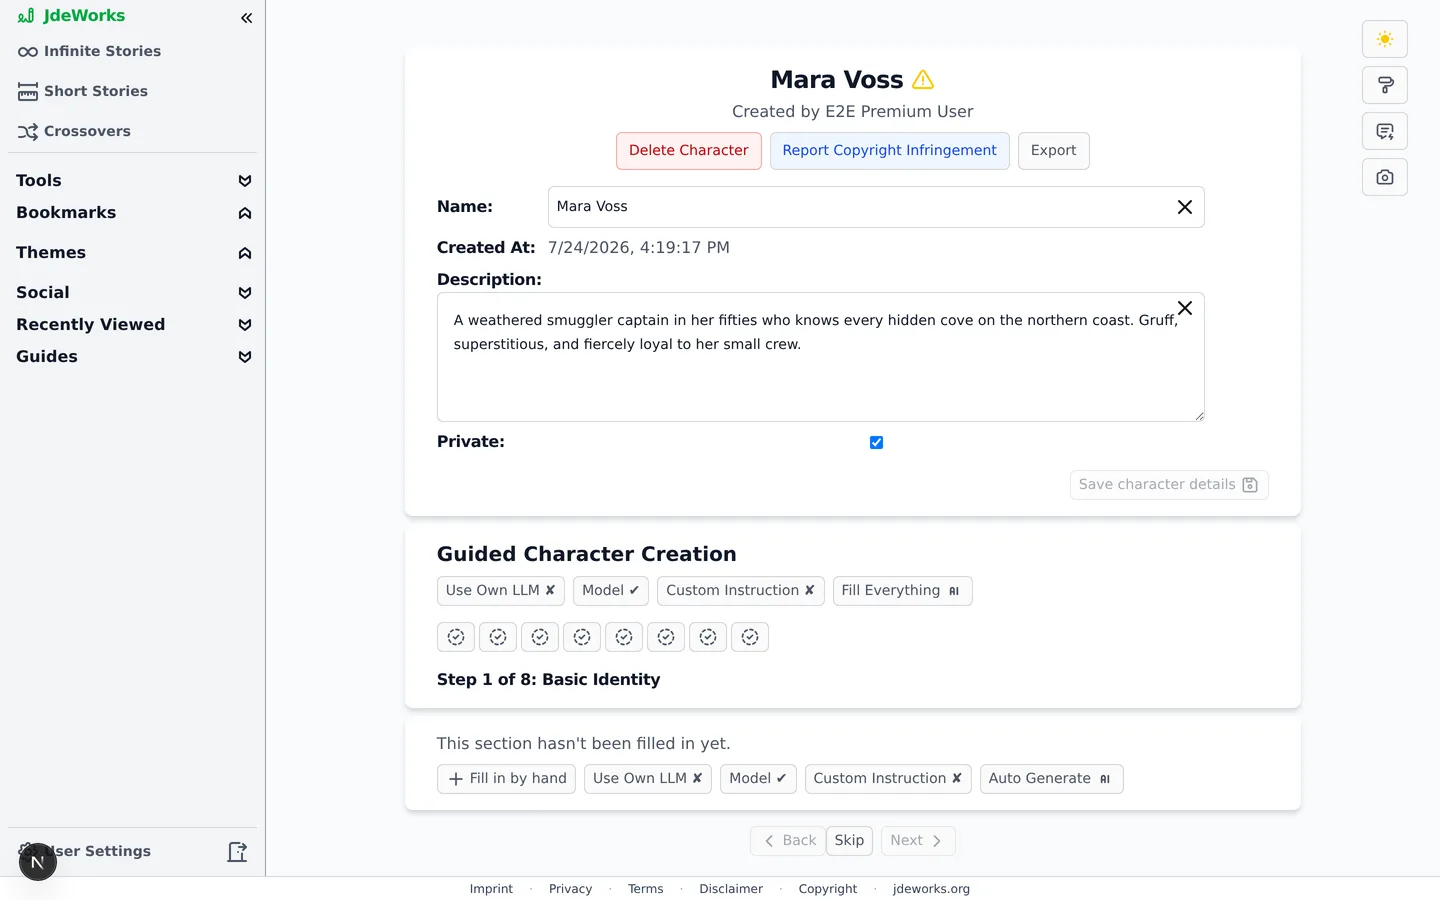
A Guided One-Shot character opens in Guided Character Creation: eight sections from Basic Identity through Personality Core, Background & Origin and Motivation & Goals up to Possible Arc & Growth. A checklist row on top shows what is done.Eight steps, each fillable by hand or by AI.Per step you choose: Fill in by hand writes it yourself for free, the AI button generates just that section, and Redo with AI replaces a filled one. Fill Everything completes all missing sections in a single call. Back, Skip and Next move through the steps and save progress automatically. The review step shows how many sections are filled and Finish guided setup hands the draft to the full editor.
Mix the modes. Write the sections you care about by hand, then let Fill Everything cover the rest in one call.
The character sheet and fleshing out
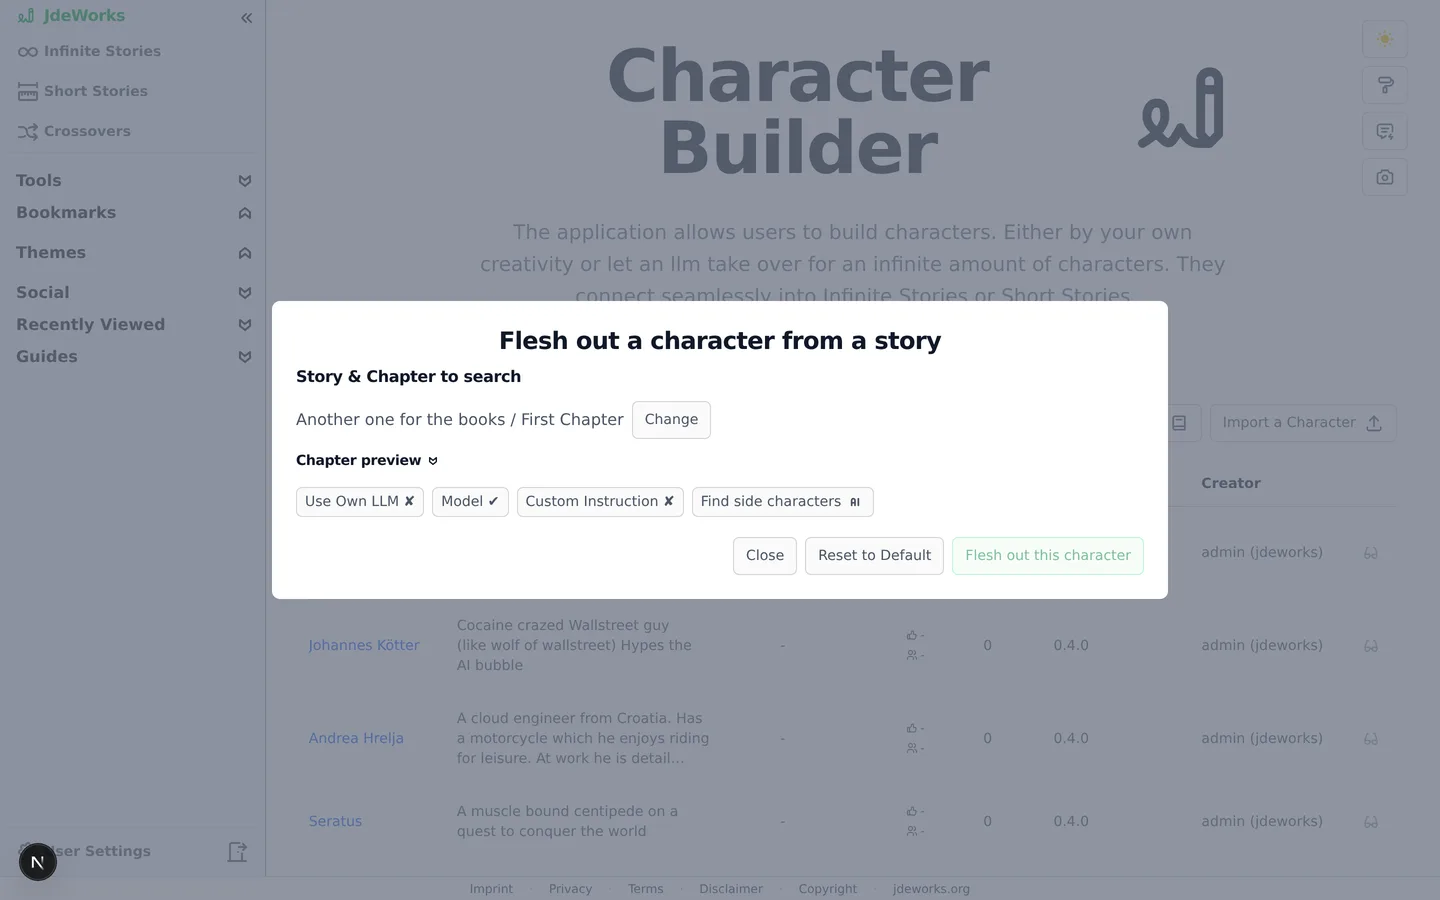
Every character ends up in the sheet editor titled Create your Character: named sections with fields you can add, reorder and delete. The AI button generates the whole sheet from your name, description and vision. Two save buttons decide visibility: Save but keep it private or Save and publish.The second creation path starts from existing fiction. Flesh out from a story on the builder page opens a dialog with a Story & Chapter to search picker. Find side characters scans the chapter for unnamed or minor figures that are not characters yet. Pick one, click Flesh out this character, and the builder creates a draft grounded in that chapter, ready for sheet generation.Turn a side character from any story into a full character.
Using characters in stories
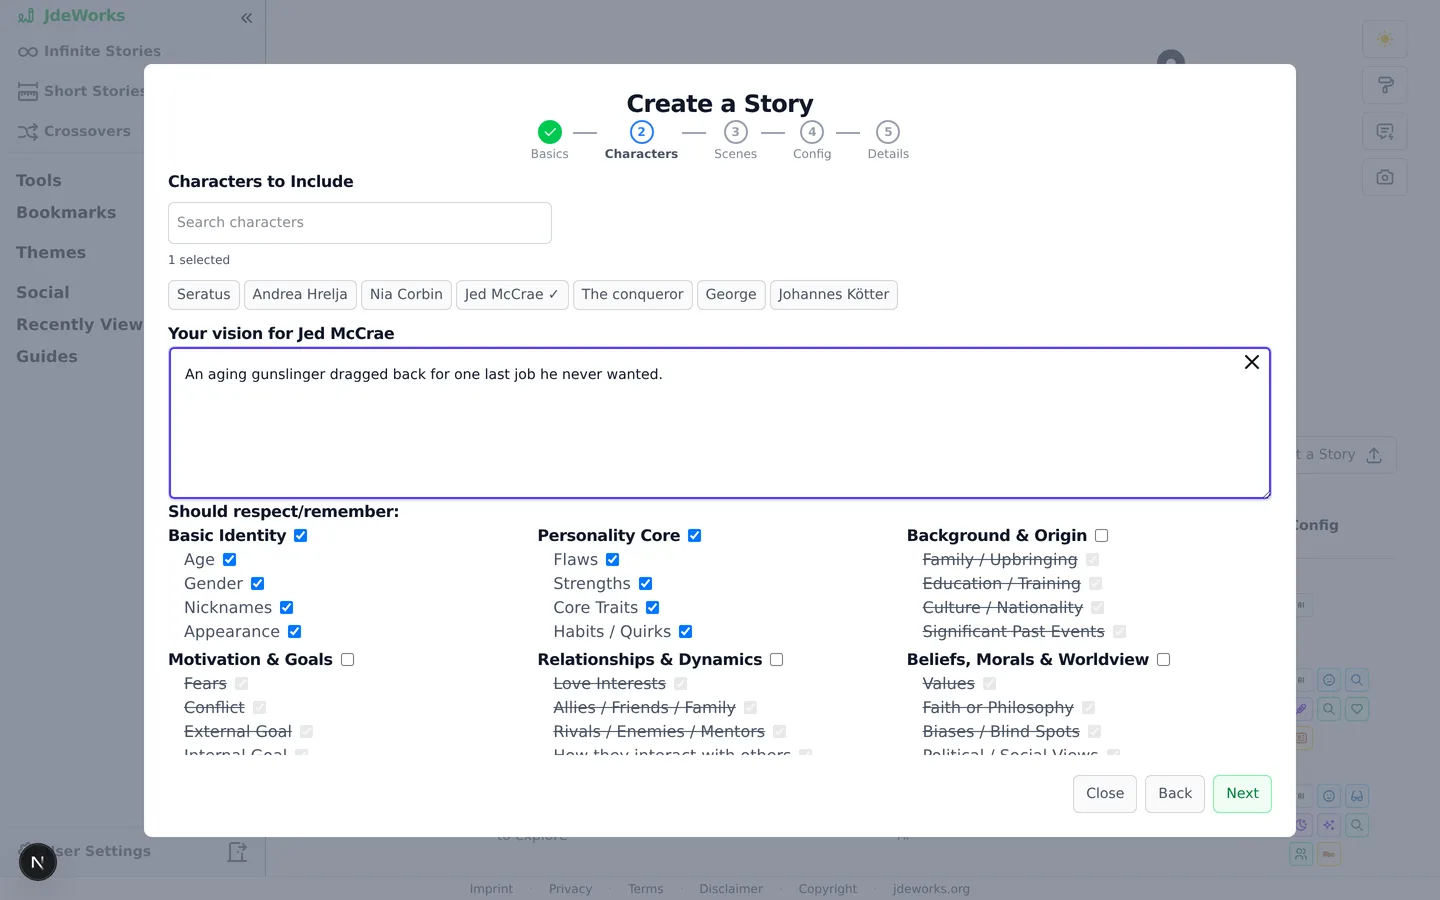
When you create a story, the Characters to Include section lists your characters and all public ones, searchable by name. The picker also carries a curated house roster, searchable by archetype, with the full sheet readable on the builder page before you add one. For each selected character you can add Your vision for them in this story and tick which sheet parts the story Should respect/remember. That vision note stays editable afterward too, from the story's roster, without touching the character's own sheet.Pick characters and tell the story which parts matter.A few more tools round the feature out. Character images can be uploaded directly for free or generated through the Image helper. Export downloads a character as a JSON file and Import a Character recreates one from such a file at no cost. Inside a story, the Character Timeline tracks injuries, deaths, items and relationship changes per chapter as the story grows. See the first story guide for story creation itself.
Best practices
Write the vision field seriously. It steers every AI generation for this character, from the sheet to story behavior.
Use Guided One-Shot for main characters and True One-Shot for quick supporting roles. The wizard's per-section control pays off where depth matters.
Flesh out side characters from your own stories instead of inventing from scratch. The extraction grounds them in scenes that already happened.
Keep drafts on Save but keep it private until the sheet reads well. Publishing puts the character in everyone's story-creation picker.
When adding a character to a story, tick only the sheet parts the story Should respect/remember. Less context keeps chapters focused.
Under the hood
Creating, saving, importing, exporting and uploading images are plain database operations and cost nothing. Only AI buttons spend credits, and each shows its estimated cost, model factor and billing class before you click.Guided creation stores its progress in the character's config after every step, so an unfinished wizard survives leaving the page. Other visitors see an in-progress notice instead of the draft.Flesh-out runs two prompts: one extracts side-character candidates from the chosen chapter, a second generates the sheet grounded in that chapter's text. The source story stays linked as an inspiration reference.Character exports are versioned JSON envelopes. Imports accept version 1 files, default to private and pass through the same content moderation as new characters.Premium accounts can run all character AI buttons through their own LLM key at zero credit cost. Image generation through the Image helper bills image credits separately from text credits.