Two power features give you full control over how chapters are generated. Custom Prompts replace the app's own prompt templates for one story. Use Own LLM connects your own API key so chapters stream straight from your provider, without spending credits. A third, smaller lever is the Model button, which picks a different backend model per task.Custom prompts are available to every account at story creation. The own-LLM connection is a premium feature. If you only want a different language or style, the far simpler Custom Instruction is usually enough.
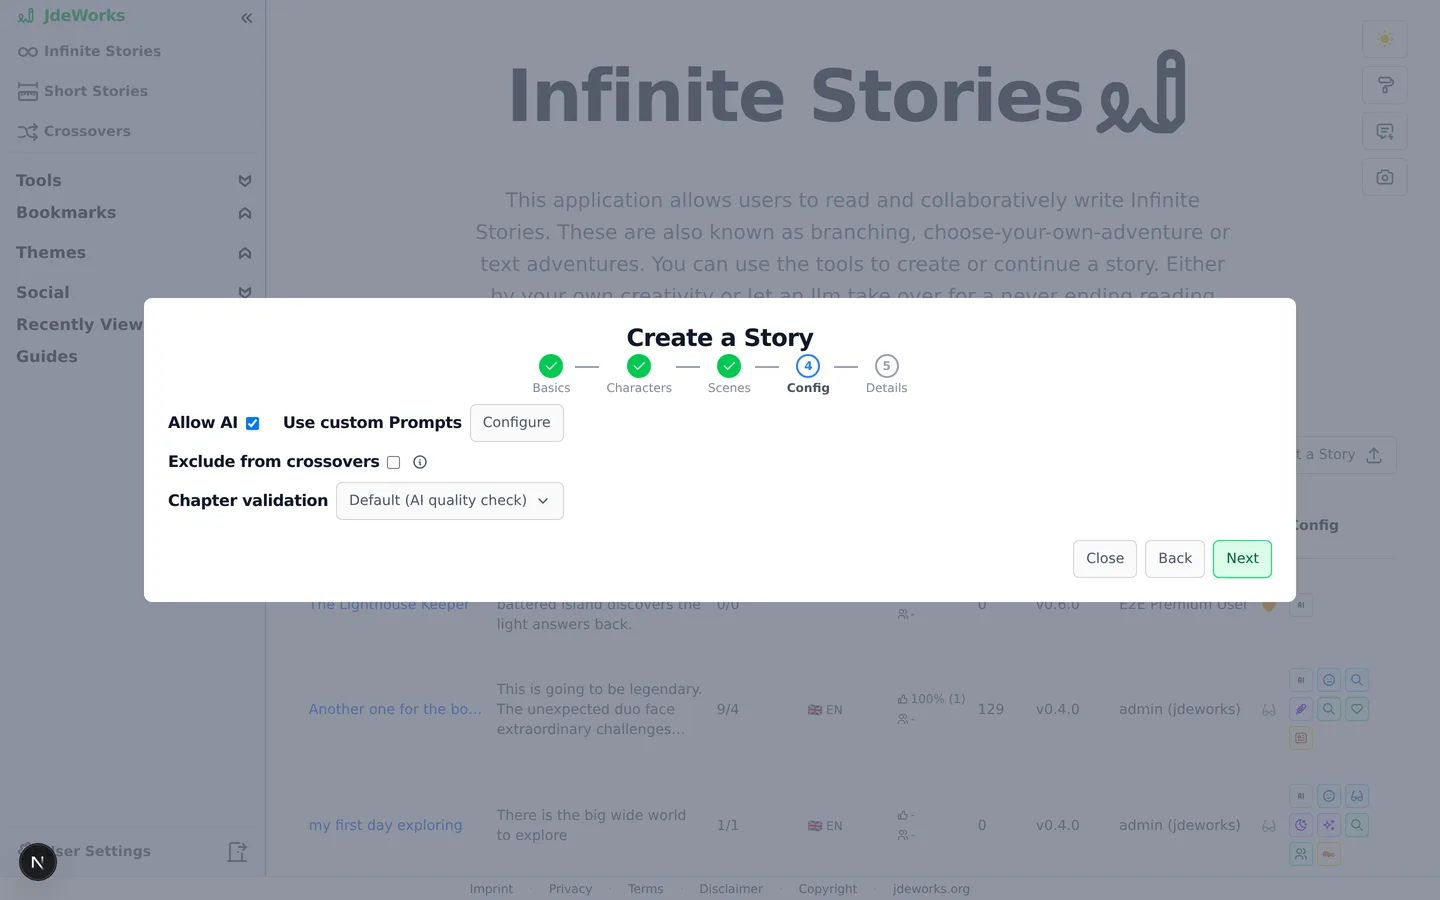
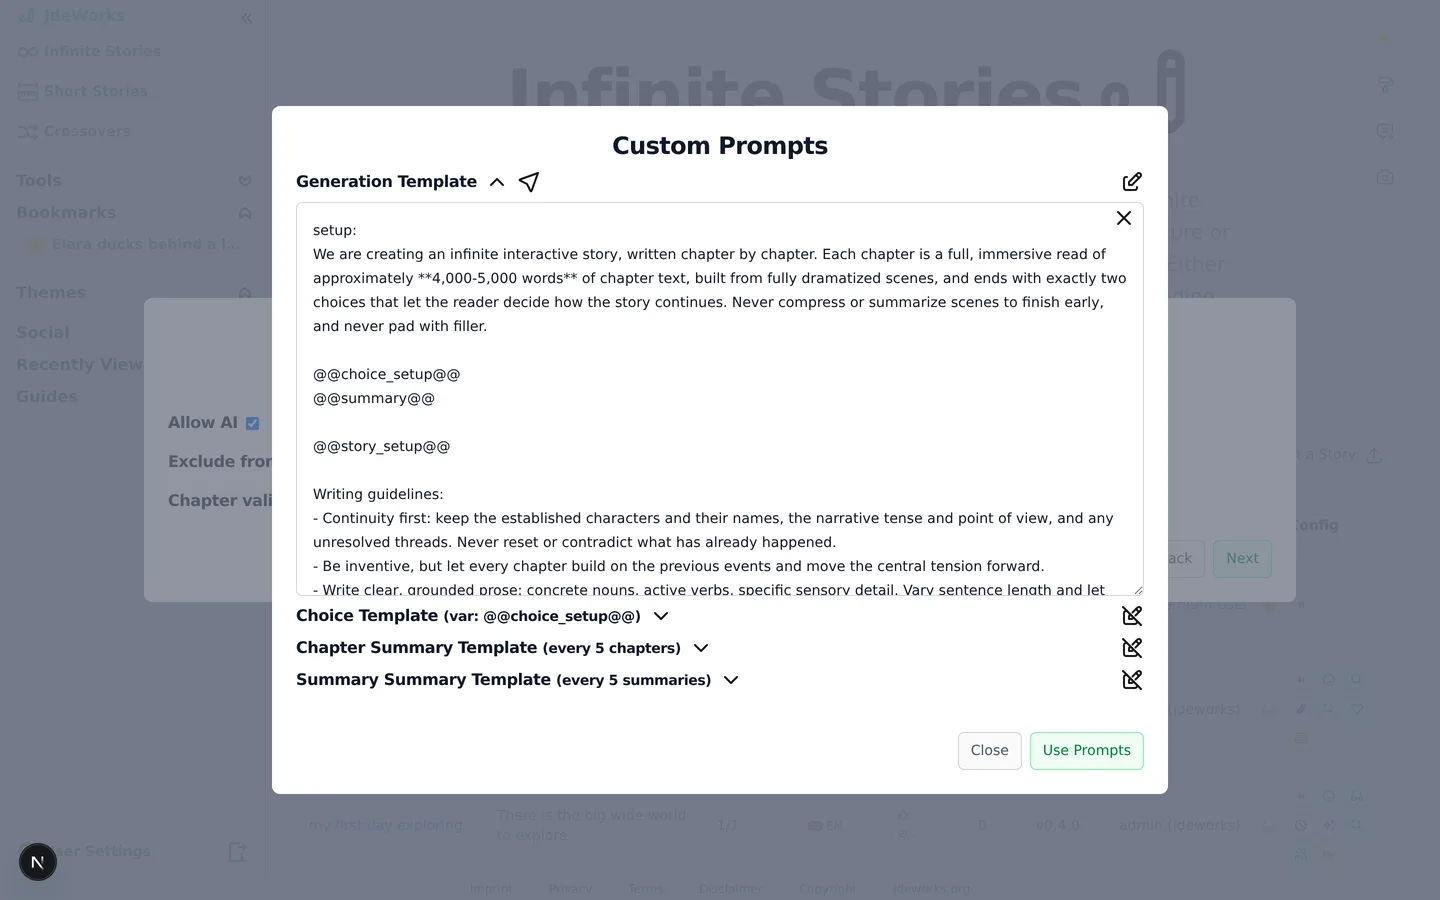
Every chapter is produced from prompt templates. On the configuration step of story creation, next to Use custom Prompts, the Configure button opens these templates for editing. Once you have changed something, the button reads Configured ✓.Custom prompts are set on the configuration step of story creation.The Custom Prompts dialog holds four templates: Generation Template (the main chapter prompt), Choice Template (how the two next choices are produced), Chapter Summary Template (runs every 5 chapters to compress history) and Summary Summary Template (compresses those summaries again every 5 summaries).
Click a template's title to expand it. It shows the app's default text, read-only.
Click the pencil icon on the right of the title to switch that template from default to custom. The text becomes editable.
Edit the text. Keep every @@placeholder@@ token, they are filled in at generation time.
Confirm with Use Prompts, then finish creating the story.
Each template starts from the default text, so you edit rather than write from zero.
Prompts are fixed at creation. After the story exists they can only be viewed, so test your templates on a throwaway story first.
Placeholders and validation
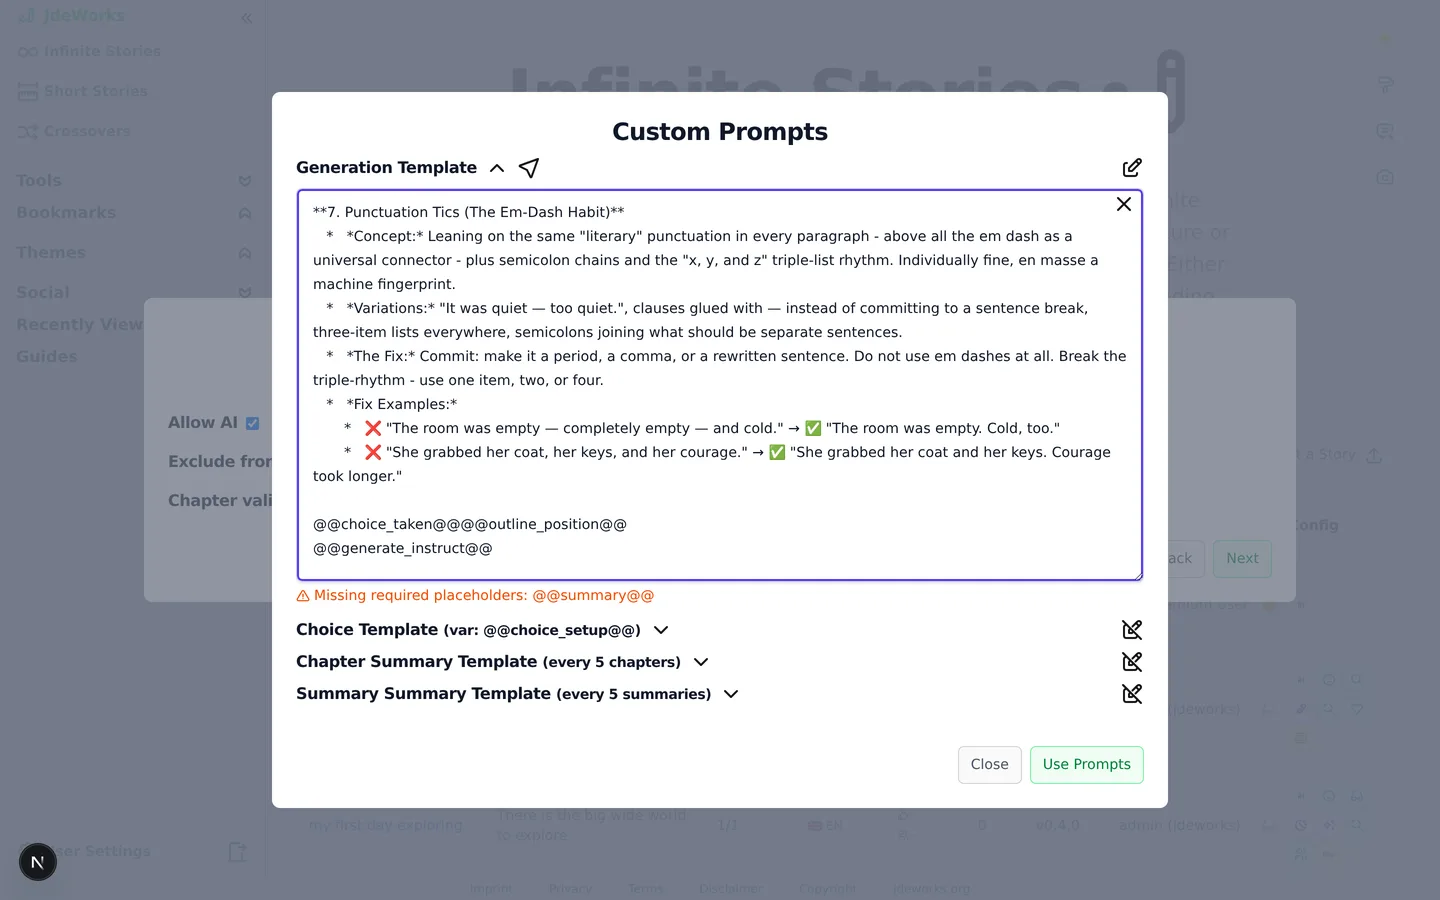
Tokens like @@summary@@ or @@choice_taken@@ are where the app injects story state into your template. The info icon next to each expanded template lists every available token with a short explanation. The Generation Template requires five of them, the two summary templates require @@chunk_id@@ and @@chapters_to_summarize@@, and the Choice Template has no required tokens.The dialog warns live under a template when a required placeholder is missing or the text exceeds the 24,000 character limit.Warnings appear directly under the edited template.
A custom template does not opt the story out of its language setting . The language directive is injected through @@generate_instruct@@, one of the five tokens the Generation Template is required to keep, so it reaches your template exactly as it reaches the default one.
On stories that use custom prompts, the story's badge row shows an icon with the tooltip Uses custom prompts. Clicking it opens the same dialog read-only, which is also how you inspect the templates of a public story before reading or forking its ideas.
Use Own LLM: your key, your model, zero credits
Premium accounts see a Use Own LLM button next to every generate button. The ✘ or ✔ behind the label shows whether an own connection is active. Chapters generated over your own connection cost no credits.The full power row: Use Own LLM, Model and Custom Instruction ride along with the generate button.
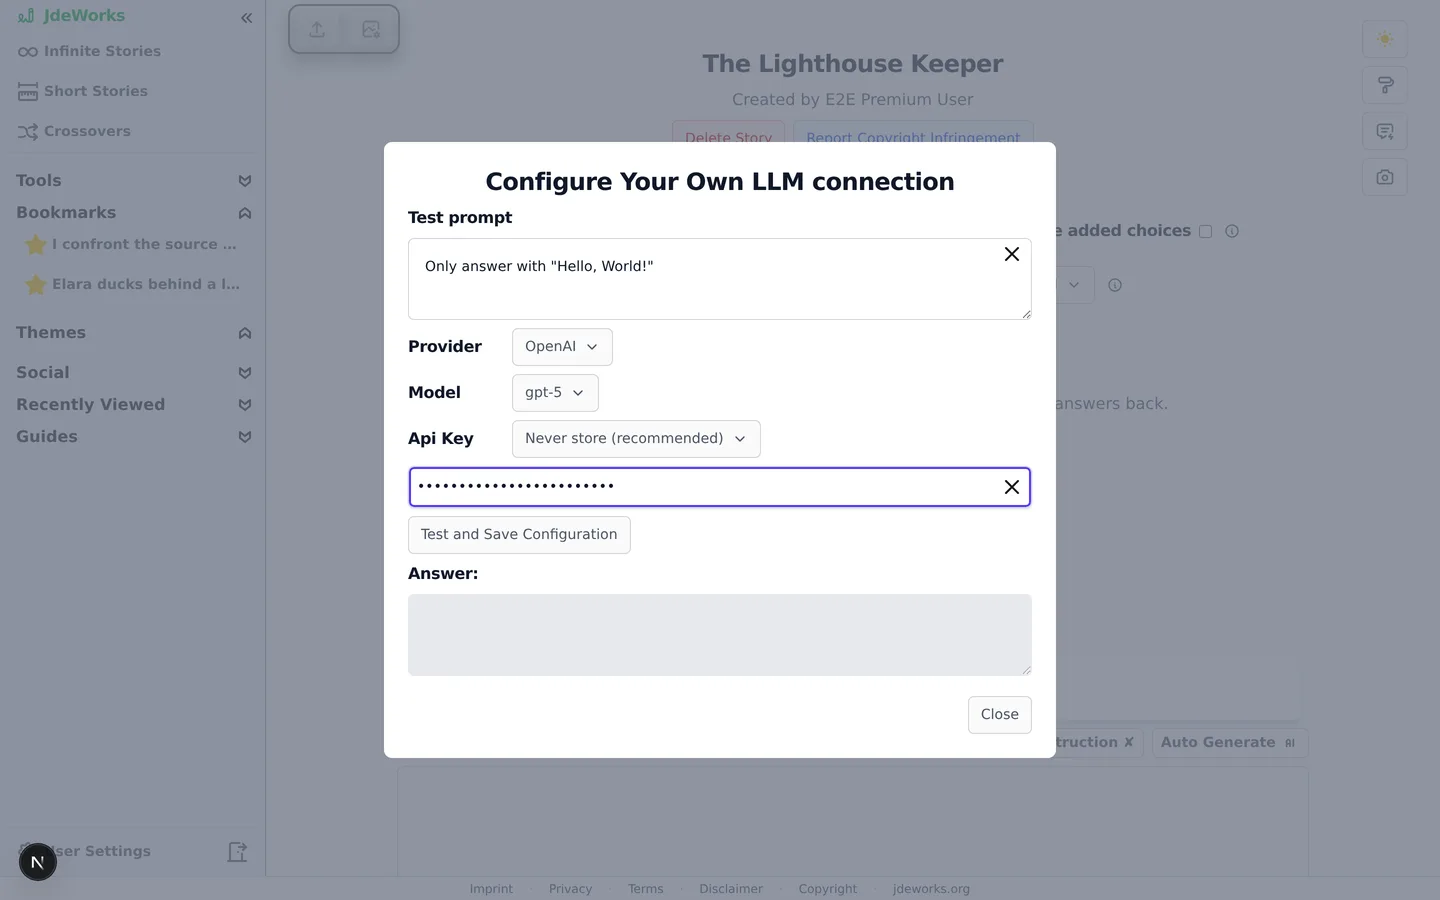
Click Use Own LLM. The Configure Your Own LLM connection dialog opens.
Pick a Provider: OpenAI, Azure OpenAI, Azure Foundry, Google, OpenRouter or a custom OpenAI-compatible endpoint. Backend switches back to normal credit-billed generation.
Pick a Model from the list, or choose the last entry to type any model key.
Choose how the Api Key is kept: Never store (recommended), in memory until the tab closes, or in local storage. Then paste the key.
Click Test and Save Configuration. The dialog runs the small test prompt and shows the model's reply in the Answer box. Only a successful test saves the configuration.
The key field is masked and the key never leaves your browser.
Your key is never sent to our servers. The browser talks to your provider directly and the generated text streams straight into the app.
The Model button: pick a backend model per task
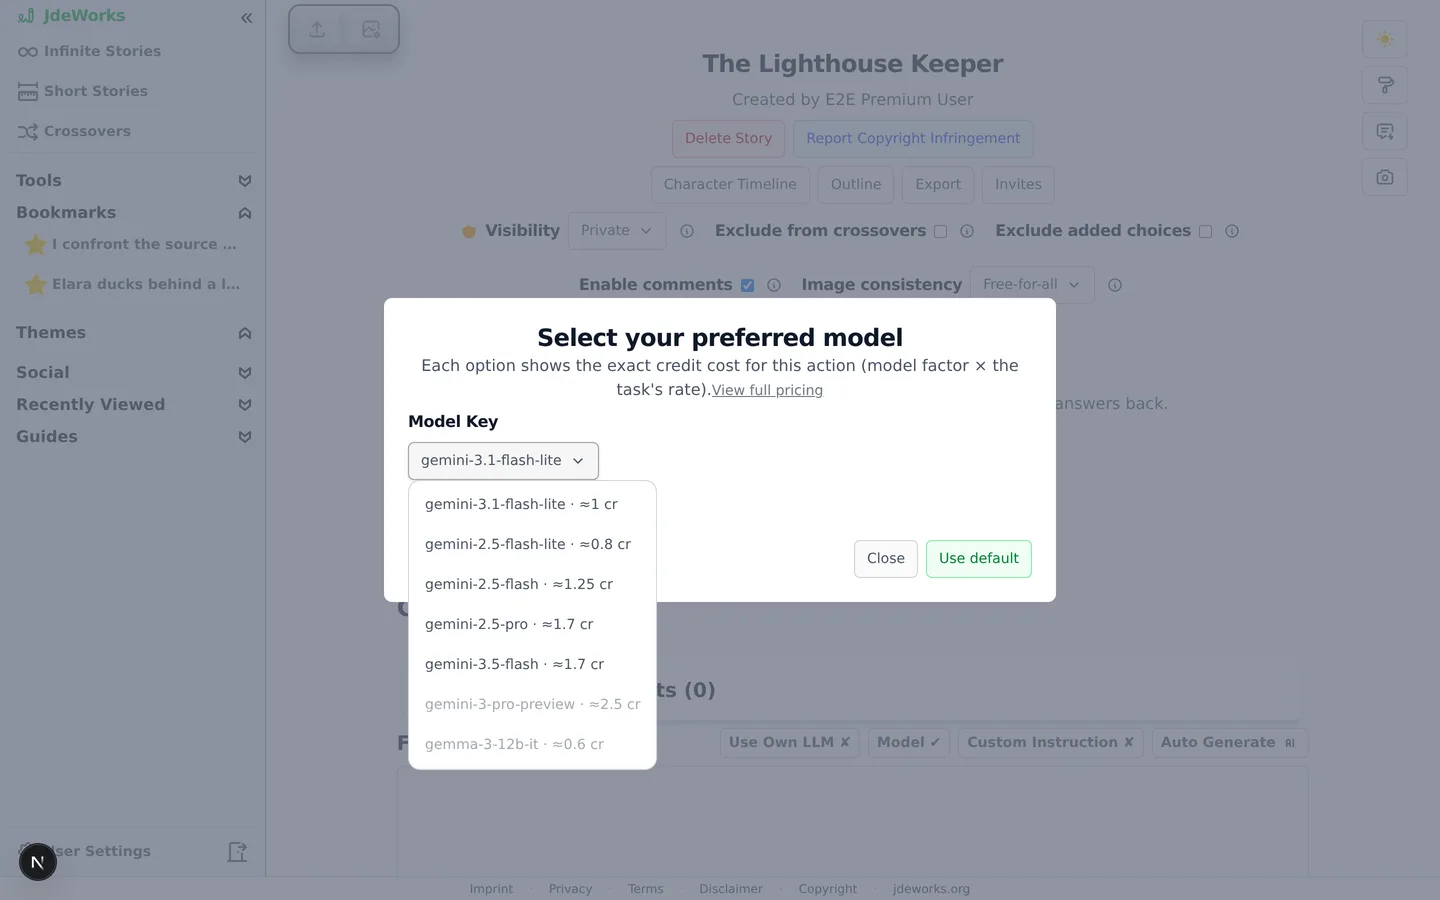
Where a model switch is offered, a Model button sits in the same row. It opens a picker for the backend's generation models, each with a short description and its exact credit cost for this action. Stronger models cost more credits per generation, budget models cost less. The shown price is the model's credit factor multiplied by the task's rate, so the same model costs different amounts on a chapter than on a one-shot, and nothing is billed until you actually confirm the generation.Each option shows the credit cost for the action you opened it from.The choice is remembered per context, so your story chapters can run on a premium model while quick tasks stay on the cheap default. The collapsible Recommendations block suggests a recommended and an economical model per use case, and View full pricing opens the complete cost overview. See the credits guide for how factors turn into credits.Hovering the Model button always shows the currently effective model and its cost per generation. With an own LLM connection active, the tooltip shows No credits used instead, because your own connection overrides the backend model choice.
Best practices
Change one template at a time and leave the rest on default. That makes it obvious which change caused which effect.
Edit around the @@placeholder@@ tokens instead of deleting them. A template that loses a required token falls back to warnings now and broken context later.
Keep your API key on Never store (recommended) and re-enter it per session. Only the test prompt needs to succeed once per configuration.
Before an expensive long session on a premium model, check the Model button tooltip. It shows the exact credit cost per generation before you spend anything.
Reach for a plain Custom Instruction first. Full template overrides are only worth it when you need to restructure how chapters are built.
Under the hood
Custom templates are stored inside the story's configuration and validated server-side on save. If a stored template is ever invalid or misses a required placeholder, generation falls back to the default template rather than producing broken chapters.The 24,000 character cap and the required-placeholder checks in the dialog mirror the backend's prompt guard, which is the enforcing side. The dialog's warnings are an early advisory copy of the same rules.The own-LLM path streams completions directly from your browser to the provider using the official OpenAI and Google SDKs (OpenRouter and Azure ride on the OpenAI-compatible API). The backend only supplies the assembled prompt text. Your key stays in the browser under the storage mode you picked.Because generation happens in your browser on your key, own-LLM chapters bill zero credits. Multi-step pipelines that must run backend-side are the exception and state their cost in the button tooltip.The backend model choice is stored per context in browser localStorage. Its credit cost is computed as the model's factor times the task's rate, and the picker shows the resolved number per model for the action you opened it from.